Inserting and editing an image?
When editing a page of your website, you may want to add an image to the body content. You'll firstly need to upload the image to the CMS, which can be done in two ways: you can either click the 'Image manager' icon on the toolbar within the editor, or alternatively, you can upload the image through the Media Centre beforehand (please see Media Centre section for assistance with this).
The image manager allows you to upload/open an image to add to your content. You can also easily upload more than one image at a time. Once your image is uploaded, select it from the library of images and click 'insert'.
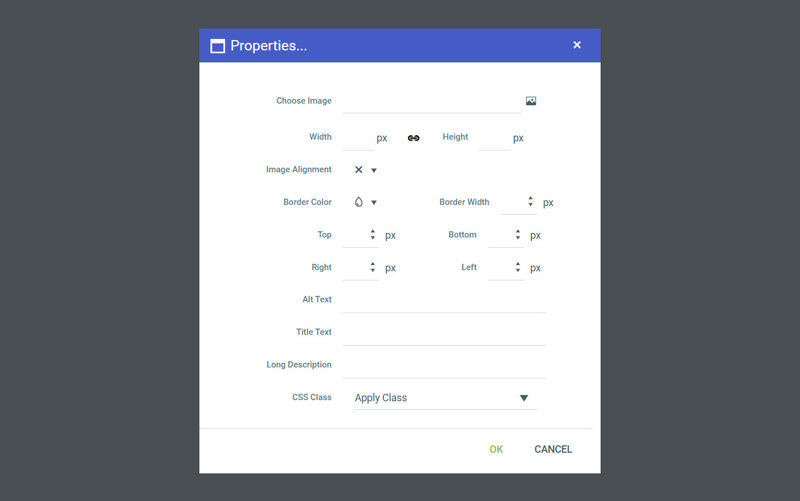
The size and position of the image may need to be edited, so once you've inserted the image, right click on it and choose 'Properties'. You will then see the following window:

This is where you can edit the image you've added to your content.
- Width/Height
The dimensions of your image can be edited here. You'll notice that there is a chain symbol in the middle. Clicking this allows you to either update both the height and width simultaneously (the height will be automatically resized when you input the width, and vice versa), or when the chain is 'broken' you can then update both the width and height separately to your desired size. - Image alignment
This allows you to right, centre or left align your image on the page. - Border colour
Allows you to select a border colour for your image. - Border width
This is where you can change the width of the border surrounding your image (if you leave this blank, no border will be added). - Top/bottom/left/rightT
hese allow you to set the amount of space around the image (your margins). This can add space beside a group of images which would otherwise sit directly next to each other, and gives space if the image will be placed alongside text. 10-20 pixels is usually a sufficient amount. - Alt text
It is good practice for SEO and accessibility reasons to always put an alternative text for images, so if an image doesn't display for any reason, there is a description instead. - Title text
This allows you to add a title for your image. - Long description
If you are presenting a complicated diagram (e.g. a chart), you should write a long description as this will help with SEO. - CSS class
This is an option used by 16i to help organise styling. This isn't something that you will need to use.